
These homemade Pop-Tarts take a little work but are more than worth it - and they taste even better than the store bought ones you know and love. Plus, a can't fail gluten-free pop tart recipe too!
Recipe and article courtesy of Stella Parks, Bravetart. Check out her cookbook: BraveTart: Iconic American Desserts. The recipes in Stella's book aren't gluten-free, but they provide lots of ideas for converting to GF!
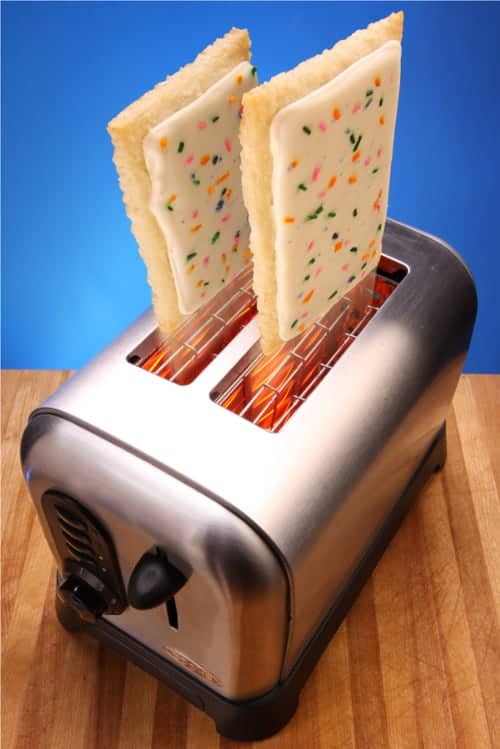
Homemade Pop-Tarts from a trained pastry chef? Yes.
Yeah. I went to culinary school. I trained in classic French technique. Yes. I can temper chocolate, laminate dough, pipe rows of perfect macarons, and make breads with my own wild-caught yeast. But my highest achievement? Homemade Pop-Tarts.
So understand me. I have no illusions of grandeur here. I didn’t want to make a better Pop-Tart, I just wanted to make a Pop-Tart, fit for the cover of my own make believe Pop-Tart Box.
If you're ready to make your own Pop-Tarts too, here's the recipe, complete with gluten-free option!
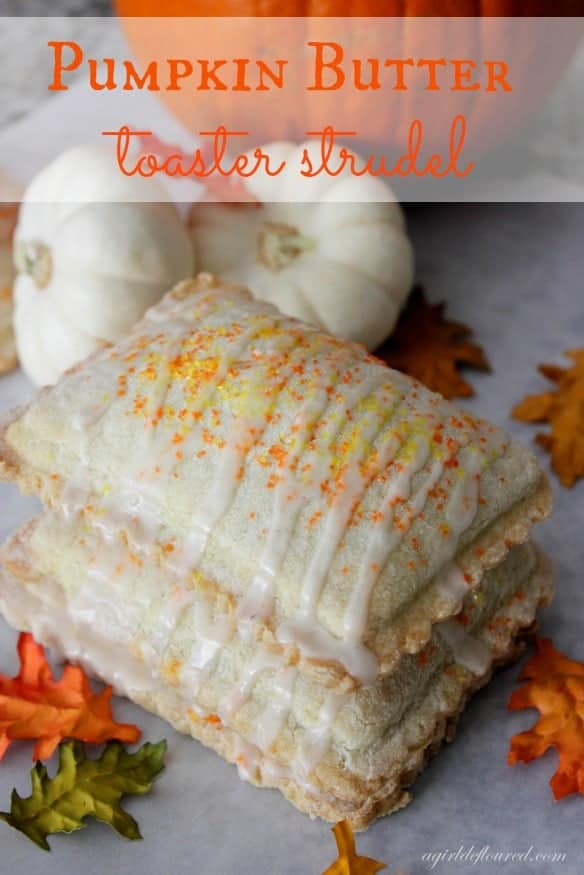
Check out these Pumpkin Butter Gluten-Free Toaster Strudels too!
Our friend Alison's Gluten-Free Homemade Toaster Strudels are full of lush Pumpkin Butter and delicious flavor. If you're in the market for amazing homemade Pop Tarts, you'll love this recipe too.
To make these Pop-Tarts gluten-free:
Stella uses a blend of: 8 ounces rice flour, 1 ounce kinako, and 1 ounce buckwheat flour. Our team has also tested the recipe with a all-purpose gluten-free flour blend with gum-free binder added with good results.
A holiday-ish filling for your Homemade Pop Tarts:
Want a filling for this Pop Tart recipe that tastes like Christmas Morning? We've had great success with this Apple & Prune Pop Tart filling recipe, reducing the water to 2 cups and adding 1 teaspoon of cinnamon and ¼ teaspoon of nutmeg. It's next-level delicious.

Homemade Pop-Tarts Recipe
Ingredients
Tart Dough
- 10 ounces all purpose flour or all-purpose gluten-free flour blend with 1 teaspoon gum-free binder (see note below for Stella's gluten-free flour blend for Pop Tarts)
- 1 teaspoon kosher salt
- 8 ounces cold butter, cubed (use shortening for vegan)
- 6 ounces corn syrup
- 1 batch of the Pop-Tart filling of your choice (jam will not work!)
Filling
- 1 ½ cups freeze-dried strawberries (or other freeze dried fruit) (1.25 ounces)
- 4 cups dried apples, still soft (12 ounces)
- 2 tablespoon applesauce (1 ounce)
Icing
- 12 ounces powdered sugar
- 2 egg whites (use corn syrup for vegan)
- ½ teaspoon salt
- 2 teaspoon vanilla
- 1 batch of homemade rainbow sprinkles, or store bought
Stella's Gluten-Free Homemade Pop Tarts Flour Blend
- 8 ounces rice flour
- 1 ounce kinako
- 1 ounces buckwheat flour
Instructions
Making the Tart Dough
- If you would like to make these gluten-free: use 8 ounce rice flour, 1 ounce kinako, and 1 ounce buckwheat flour. This blend works perfectly and they taste like pure Pop Tart perfection.
- Cut the butter into the flour, along with the salt, until reduced to pea sized lumps. You can use a hand/stand mixer or a food processor, or just do it with your fingers. Then add the corn syrup all at once and mix/blitz/stir until it forms a ball. Dust your hands with a little flour, scoop out the dough, and knead lightly until smooth.
- Flatten the dough into a squarish shape, wrap in plastic, and chill 30 minutes or as long as you like. Even so long as three days.
Rolling out the dough
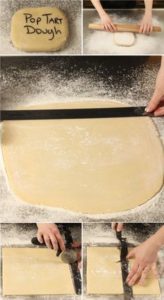
- Okay, listen up. Roll the dough to ¼”. This is important. Because each Pop-Tart will ultimately have 4 “layers” (pastry + filling + pastry + icing), you need to pay close attention to the thickness of each. So, when rolling out the dough, make sure to actually measure the thickness. If you don’t, between those layers, you could easily end up with a 1” thick Pop-Tart; frankly that sounds gross.

- Take the chilled squarish lump of dough and set it onto a surface dusted in sifted powdered sugar. Roll the dough evenly both left-and-right and up-and-down, but don’t roll diagonally! This will preserve the squarish shape and minimize re-rolling. Lift and move the dough periodically to make certain it hasn’t stuck, dusting underneath as needed.
- Once the dough has reached ¼” thickness and an overall square shape, use a ruler to cut it into however-many 3 ⅛” wide strips. Then, cut each strip every 4 inches. Yes. A real Pop-Tart measures exactly 3 ⅛” by 4”.
Rolling the Pop-Tart Dough
- Use a ruler so you can impress your friends with your mad Pop-Tart skills. Sloppy, irregularly shaped Pop-Tarts won’t impress anyone.
- Gather the scraps, knead them very lightly into a smooth ball, re-roll and cut another round of rectangles. Altogether, the dough will withstand 3 rounds of rolling in your quest for 24 pieces. The dough is ultra forgiving.
- Store the rectangles on a parchment or wax paper lined cookie sheet, covered in plastic, in the refrigerator until needed.
Make the Filling
- Place freeze-dried strawberries in the bowl of a food processor. Cover with a sheet of plastic to contain the dust and grind until powdery and fine. Discard the plastic, add the apples, and pulse until the mixture forms a ball, about 2 minutes. Add applesauce and process for a minute more, pausing halfway through to scrape the bowl and blade with a flexible spatula.
Making the Pop-Tarts
- Preheat the oven to 350°F (180C)
- Have the Pop-Tart filling ready. You can either use a pastry bag and pipe the filling directly onto the Pop-Tarts, or you can roll the paste out between two sheets of plastic wrap and cut it to size. I’ve described both methods in detail here.
- Once 12 dough pieces have their fruit filling, top them with the remaining dough pieces. Smooth the dough over the fruit filling and gently press out any air bubbles. The rounded end of a bench knife or the handle of a wooden spoon, makes a great tool for sealing the edges smoothly.
- You don’t have to press very hard, the dough pieces will naturally bake together. The most important part is to simply press out any air between the filling and the pastry.
- Filling the Pop-Tarts
- Just to reiterate, and for some this may be difficult: do not use a fork to crimp the edges! I mean geeze, have you ever seen a Pop-Tart before? They totally do not have crimped edges. Don’t ruin this, you’ve come so far!
- Once you’ve smoothly sealed the edges of the Pop-Tart, carefully dock each one with a fork, about eight times (two rows of four). Pricking them lightly with a fork creates small steam vents to prevent them from puffing up in the oven.
- Transfer the Pop-Tarts to a parchment lined cookie sheet and bake for about 20 minutes, until lightly browned all over. You don’t want them “golden brown” by any means, real Pop-Tarts look downright anemic.
- Occasionally, a Pop-Tart or two will spread somewhat irregularly during baking. While they’re still warm from the oven, you can trim the edges again quite easily with a bench scraper or knife.
- Cool thoroughly.
Frosting the Pop-Tarts
- Use a clean towel or dry pastry brush to dust off each Pop-Tart, removing any stray crumbs.
- Combine all of the icing ingredients in a bowl and mix until a smooth paste forms. Put some of the icing into a piping bag fitted with a small, plain tip. Pipe a boarder of icing around the perimeter of each tart, leaving about a ¼” margin.
- Thin the remaining icing, a tablespoon of water at a time, until it reaches a pourable consistency. Pour a tablespoon of icing onto each tart and use the tip of a metal spatula to help it reach all of the corners. Pop-Tarts only have a thin smear of icing on top, so easy does it.
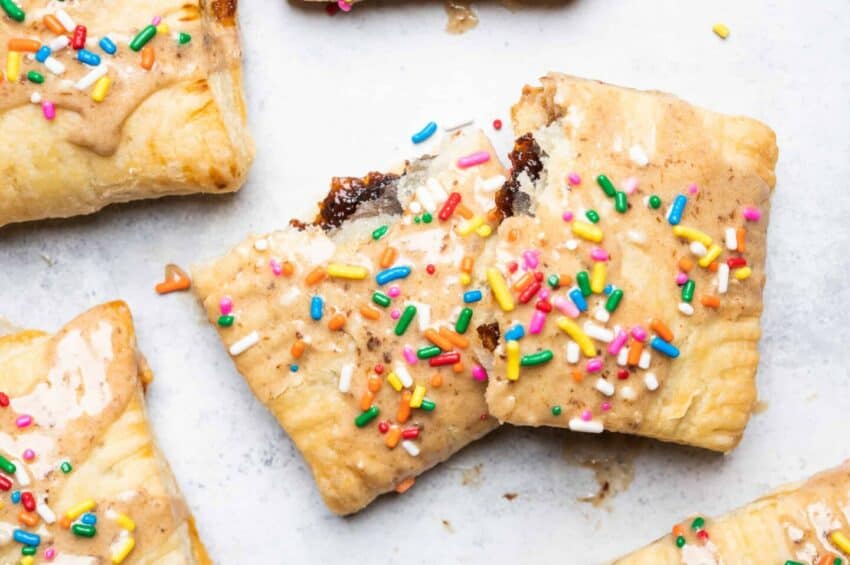
- Let the icing dry for about 3 minutes or so before adding the sprinkles. Homemade or store bought, the sprinkles tend to bleed if they go on too soon.
- The Pop-Tarts now need to dry, excruciatingly, overnight. They taste waaaaay too fresh the first day, and the icing will still be sort of damp and moist inside, which isantithetical to the Pop-Tart experience. After 12 hours of air-time, you’ll have unbelievable Pop-Tart perfection.
- I know curiosity will get the better of you and you’ll try a freshly iced Pop-Tart even though I warned you. But then, a few days later, you’ll have another one, and you’ll say to yourself, “Holy Crap. That kid from BraveTart sure knows her homemade Pop-Tarts, this is incredible!”
- And, on that note: These homemade Pop-Tarts last forever. I’d say they last at least two weeks. They become tastier over time. It’s a mysterious process I’ve never witnessed in any pastry before, but like real Pop-Tarts, aging on the shelf a few weeks really ups their game. (The gluten free version is especially friendly to aging. Even more delicious after a few days!)

")

")
Let Us Know What You Think