
 Try this incredible Gluten Free Oreo recipe from our friend BraveTart! Get her delicious new cookbook "Iconic American Desserts" here!
I originally shared this recipe for my column on Serious Eats. Read that post, Meet the Fauxreo, to see more photos and learn how this recipe differs from other homemade Oreos. The recipe I posted there makes a half batch, if making sixty four cookies seems intimidating.
For the most authentic “Oreos” I recommend shortening instead of butter for the filling. Butter will work perfectly well and is unarguably more delicious, but sometimes you must sacrifice deliciousness for accuracy. If you decided to go the butter route, you might as well throw in some vanilla beans, a likewise delicious but inauthentic upgrade.
Use rice flour instead of all purpose for a gluten free variation; I actually prefer rice flour because it gives the Fauxreos a more crisp, Oreo-like texture.
Ingredients
Fauxreo Cookies
6 ounces butter, room temperature
7 ½ ounces sugar
3 ounces brown sugar
1 tablespoon Kosher Salt (if not using Kosher or flake sea salt, cut this back a bit)
¾ teaspoon baking powder
½ teaspoon baking soda
2 teaspoon instant coffee powder
1 tablespoon Gluten Free vanilla extract
5 egg yolks
8 ounces rice flour, sifted
6 ounces cocoa powder, sifted
cocoa for rolling out the dough
a few teaspoons of hot water or coffee
Fauxreo Filling (see notes below for flavoring the filling)
6 ounces butter or shortening
10 ounces powdered sugar, sifted
1 tablespoon Gluten Free vanilla extract
¼ teaspoon salt
Directions
Make the cookies
Using a hand or stand mixer, cream together the butter and sugars, along with the salt, baking soda, powder, espresso, and vanilla bean seeds. None of that “light and fluffy” business. Just until combined.
Then (while still mixing) add in the vanilla extract and yolks, one at a time. Once they’ve mixed in, use a rubber spatula to scrape the bowl down. Turn the mixer back on. With the mixer still running, add the flour and cocoa. The mixture will be quite stiff, but continue mixing on low speed until uniform.
Divide the dough in half, flatten each portion into a disc, wrap with plastic and refrigerate about 30 minutes or up to a week.
Preheat the oven to 350°.
If your cookie sheets are dinged up or uneven, line them with parchment paper to create a flat surface for the cookies. Otherwise, simply have two, ungreased sheet pans at the ready.
Using cocoa powder instead of flour for dusting, roll the Fauxreo dough to ⅛” thickness. (The thickness is very important, so check with a ruler! Two ¼” wafers plus filling will give you a Fauxreo that’s nearly an inch thick. No good!)
Slide an offset spatula between the rolled dough and the counter, this will loosen the dough from any places where it might be sticking. Use a 2” round cutter to punch out the wafers. Use a butter knife to help lift and transfer the cookies to the cookie sheets.
The cookies will not spread very much during baking, so you can place them quite close together. Set them aside.
Gather up, knead, and re-roll the scraps, likewise arranging on a cookie sheet.
Now gather up any remaining dough (about 3 oz) and transfer it to a mixing bowl. Add a little hot water or coffee, just a teaspoon at a time, and mix until the dough has been thinned into a paste. You can always add more liquid, but you can’t take it away, so add slowly and let each addition mix in fully before adding more.
When the mixture has reached a consistency like frosting, transfer it to a piping bag fitted with a very small tip, or a zippy bag that has just a tiny hole poked in the corner. Use a heavy duty zippy bag, thin sandwich bags will burst during piping.
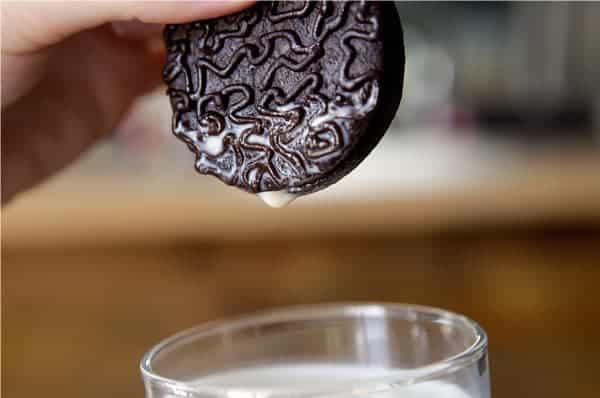
Pipe some sort of design atop each cookie. A tight cornelli design gives a strong impression of an Oreo. But any design at all gives the cookies a really fun feel; whether simple shapes like hearts and circles, a short message, name or something totally abstract. Anything will do.
Bake the cookies for about 12 minutes.
You can cool them directly on the cookie sheet, no need to dirty up a wire rack.
While the cookies are cooling, make up the filling.
With a hand or stand mixer, cream together the shortening/butter and powdered sugar, along with the vanilla and salt. Scrape down the bowl occasionally as you mix, and then let the mixer run, on medium speed, for about 10 minutes. The mixture will become very fluffy and white over this time, and will also become less gritty.
Transfer the filling into a pastry bag fitted with a plain tip. Alternately, you can portion the filling with a melon-baller sized ice cream scoop, or by using zippy bag with the corner snipped off as a makeshift pastry bag.
In either case, wait until the cookies have cooled completely before filling.
Flip half the Fauxreo wafers upside down. Onto each, pipe or scoop a small dollop of filling (a ¼ ounce “Double Stuf” and ⅛ ounce for regular) into the center.
To finish, top with another wafer and press down until the filling reaches almost to the edge of the cookies. You must apply a very even downward pressure so the filling will spread out evenly.
Finally, transfer the Fauxreos to an airtight container and refrigerate for several hours. It is this last step that is most important. After whipping the filling, it will be especially soft. Refrigerating it (especially if you’re using butter) is crucial for solidifying the filling and helping it to bond with the wafers.

Store the Fauxreos, refrigerated, for up to two weeks or frozen for a month or more.
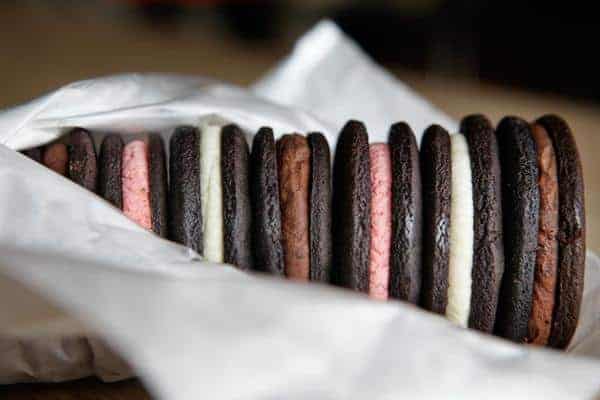
Make Neapolitan Fauxreos by dividing the finished filling into three portions. Leave one portion plain. Mix 2 Tablespoons cocoa powder into another. Mix ¾ ounce freeze dried strawberry powder into the third. Fill the cookies as directed.
Make peppermint Oreos by including a half teaspoon peppermint extract in the cookie dough itself and one quarter teaspoon peppermint extract in the filling. Give people a heads up on the flavor by including just a drop of red or pink food coloring in the filling as well.
Recipe Credit: BraveTart
Let Us Know What You Think