Here are step-by-step directions to make these cute Frankenstein Cookies direct from my friend Kelli Eldred.

She literally taught me how to make these, on camera, in the video below.
My first "fancy" sugar cookie ever is the bottom one in the photo to the right! It's not perfect, but by the second one, I had it down.
Making these Frankenstein Cookies doesn't take much more than square sugar cookies & royal icing!
Here's what you need:
- Square (2 or 2 ½ inch) Sugar Cookies
- 1 batch of Royal Icing
- Green + Black Food Coloring: (gel color works best)
- Tipless Icing Bags
- Scribe tool (or a cheese pick or toothpicks)
To decorate you Frankenstein Cookies:
Place 2 tablespoon of plain white royal icing in a sealed container. You'll need it later for eyes and decoration.
Dye half of your remaining icing black, and the other half Frankenstein green. Load a tipless bag with each color. Cover the remaining icing so it doesn't harden.
Place a cookie on a flat work surface. Snip the very end of each tipless bag, so they make a very fine line of icing.
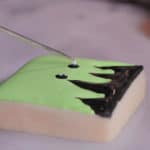
 Outline your monster's hair: using black icing, make a straight line across the top of the cookie, them a jagged line about ⅓ of the way down. Then fill (flood) in the hair section, using your scribe tool to spread the icing. Wipe any excess off the scribe tool.
Outline your monster's face: using green icing: carefully trace the hairline and the remaining three sides of the square. Flood the face area with icing, and use the scribe tool to fill in any empty spots. (If you are pushing around a lot with the scribe, use a little more icing.)
 Allow the cookie to dry for 5-6 minutes, or until the icing has begun to set.
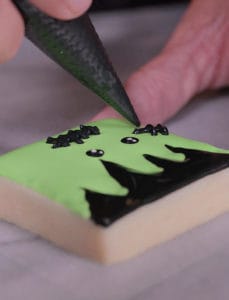
Add two black dots for eyes under the hair. Dip the point of your (clean!) scribe tool into the white icing, and touch it to the center of each eye and the upper left corner to add just a bit of white.
Make your monster's mouth: draw a straight line on the bottom of the cookie, then give it 3-4 "stitches" going across the line in the opposite direction.
Give it flair: you can add another small stitch (that's what we did), leave it plain, add green sugar, or whatever you like!
Allow your Frankenstein Cookies to dry completely. That's it!
I can’t wait to see your creations! Tag me on Instagram @gfreefoodie to share your masterpieces. Follow Kelli to see more of her cookies here: @kookiesbykellieldred
Try these easy Mummy Cookies + cute Pumpkin Sugar Cookies too!


Let Us Know What You Think